Building Style Notes Episode 1 — Constructing Medieval Village Houses Beyond Box Houses
This story was machine-translated from Korean.
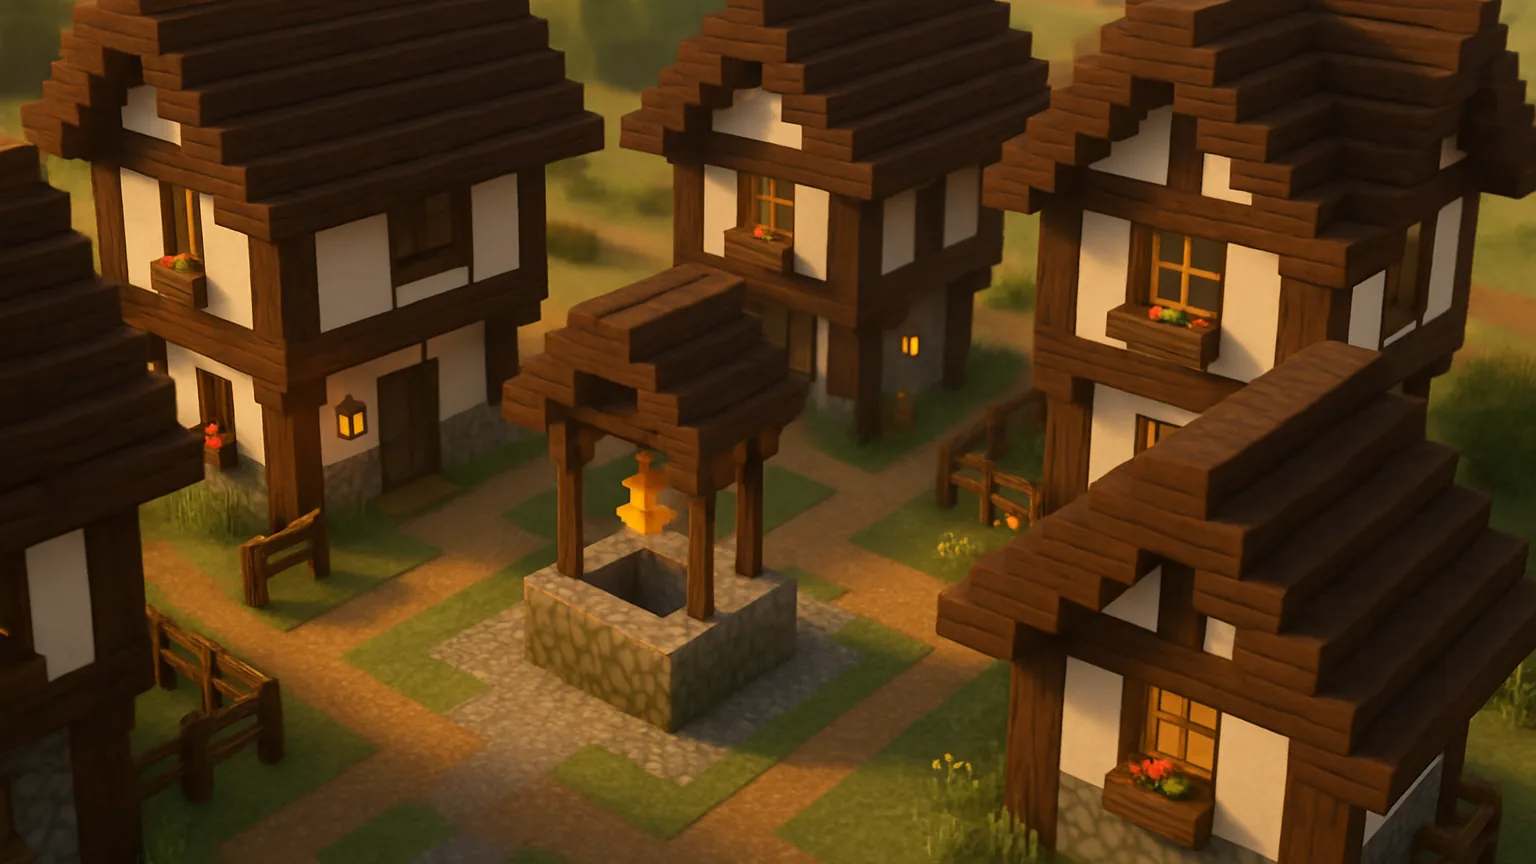
The first house you build usually looks similar. You set up four walls with oak planks, cover the top flat, and add a single glass pane. It keeps the rain out, but it still looks like a box. It's not due to a lack of materials. Houses that look like boxes lack depth, proportion, and roofs.
MCNOW's original "Building Style Notes" organizes everything from block palettes to building order and common mistakes for one style at a time. Episode 1 focuses on the medieval village house, which beginners can achieve results with quickly. You can build it using only wood and stone available in the early game of Survival, and the principles learned here apply to any other style.
Block names follow the Korean translations for Java Edition. The English names are provided the first time they appear. Block action descriptions are also based on Java Edition.
Why does my house look like a box?
By addressing the issues with box houses one by one, we can find ways to fix them.
- The walls are flat. All blocks are on the same plane, so no shadows are created. From a distance, the walls look like a flat picture.
- There's only one material. If you use just one type of plank for the floor, walls, and roof, it becomes hard to distinguish between the framework and the walls.
- The roof is flat. The impression of a medieval house comes mostly from the roof. Without it, all you have left is a box.
- The proportions are awkward. A house that is 5×5 and 3 blocks tall looks like a warehouse.
Fixing these four issues is what Episode 1 is about.
Palette — Framework, Walls, Base, Roof
The palette is a list that determines 'which blocks to mix.' For medieval houses, separating materials by role makes it halfway done. Below is a basic palette made only from blocks that are easy to obtain in Survival.
| Role | Main Material | Mixing Materials |
|---|---|---|
| Pillars & Beams (Framework) | Spruce Log | Dark Oak Log, Stripped Spruce Log |
| Walls (Plaster Feel) | Calcite | Birch Planks, Polished Diorite |
| Base (Lower Stone) | Cobblestone | Stone Bricks, Mossy Cobblestone, Andesite |
| Roof | Spruce Stairs | Spruce Slab, Dark Oak Stairs |
| Details | Spruce Trapdoor | Flower Pot, Lantern, Spruce Fence |
The principle is dark framework, bright walls, heavy base. The pillars should be darker than the walls so that the wooden framework stands out clearly. Calcite is the white stone that appears in bands in the Java Edition's Amethyst Geodes and Sharp Peaks terrain. If it's hard to obtain, you can substitute with Birch Planks or Polished Diorite for the same effect. If you want to lighten the pillar color, using an axe on logs will turn them into Stripped Logs (this can't be reversed). You can use Stripped Logs for the middle pillars to distinguish them from the corner pillars.
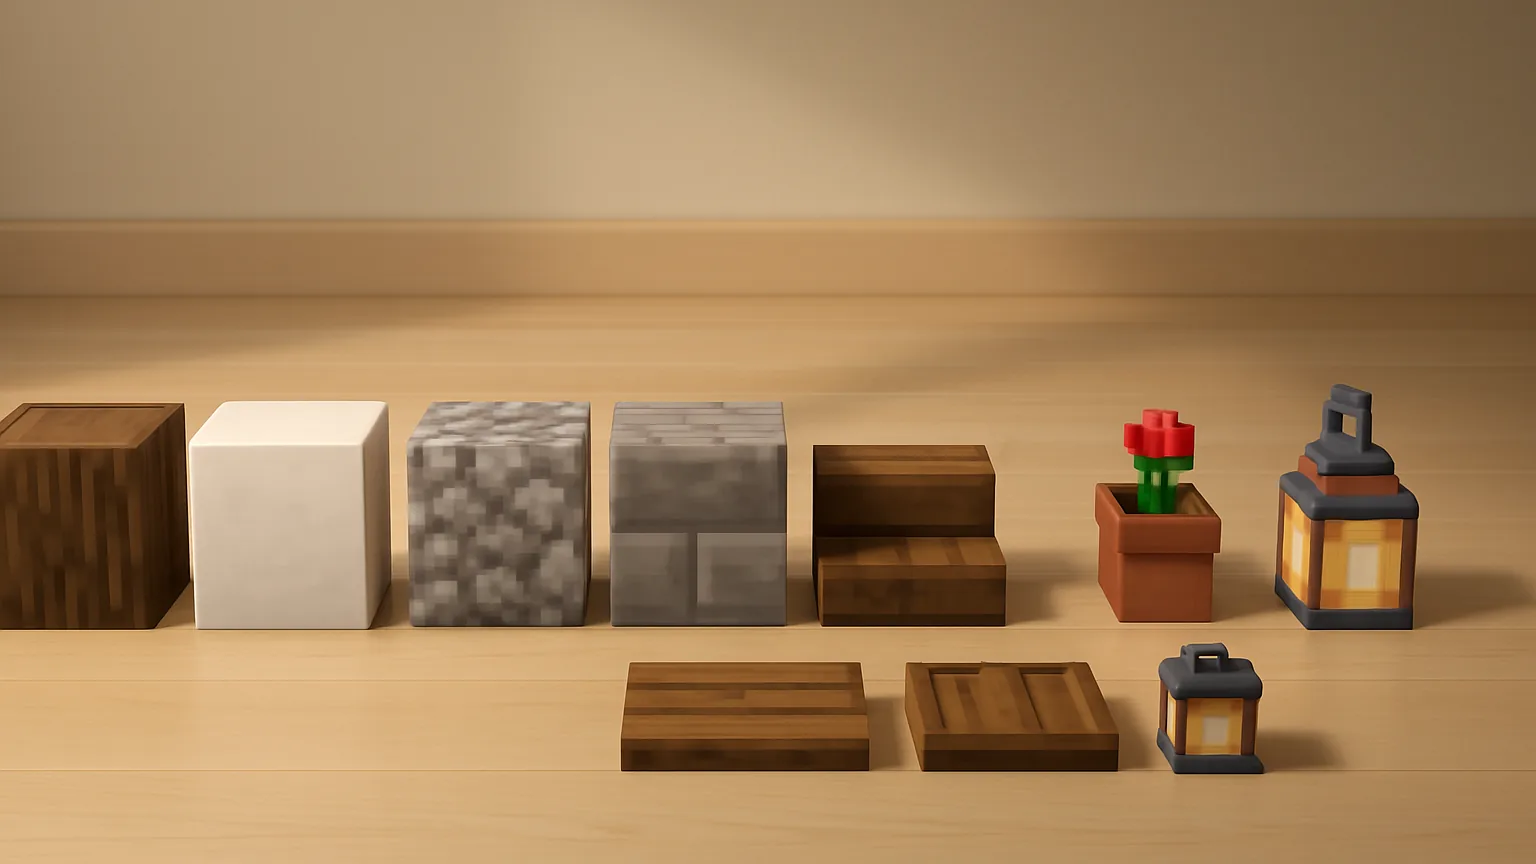
Don't just use cobblestone for the base; mix in some mossy cobblestone or andesite here and there. Mixing blocks of different textures but within the same color scheme will make the walls look like aged stone. However, it's safest to keep the mixing ratio around 20-30% of the main material. If you mix too much, it can look too patchy.
Building Order — Six Steps
You don't start stacking walls for a medieval house. First, set up the framework and fill in between.
- Define the footprint. If it's your first time, a rectangle of about 7×9 is manageable. A rectangle that's longer on one side looks much more natural when the roof is placed on top.
- Lay the base. Stack cobblestone and stone bricks 1-2 blocks high around the perimeter, one block higher than the ground. This makes the house look like it's 'sitting' on the ground.
- Set up the corner pillars. Place spruce logs vertically at the four corners. If the walls are long, add an extra middle pillar every 3-4 blocks.
- Add the beams. Lay the logs horizontally on top of the pillars. The direction you place the logs determines the grain, so if you place them from the side, they will become horizontal beams.
- Fill the walls. Fill the space between the pillars and beams with stone. If you place the wall one block inside the pillars, the pillars will stick out and create shadows. This is called 'depth'.
- Extend the second floor. If there's a second floor, extend the floor one block beyond the first floor walls and support it with upside-down stairs. This creates the characteristic silhouette of a medieval wooden house with an overhanging upper floor.
Roof — half of the house is the roof.
The roof is made with stair blocks. Each time you go up one block, the roof should slope inward by one block at a 45-degree angle. Medieval houses look better with steeper slopes, so once you're comfortable, try a steep slope where you go up two blocks for every one block in. (You can support this with logs or planks on top of the stairs.)
- Extend the eaves. Extend the roof edge one block beyond the walls. A roof without eaves looks like a box with a lid on top.
- Use upside-down stairs. If you place stairs looking at the bottom or the top side of a block, they will be installed upside down. Supporting the eaves with upside-down stairs makes the roof look thicker.
- Corners automatically bend. When stairs are placed next to other stairs, they automatically change to inside or outside corner shapes. Just connect the stairs where the roofs of L-shaped houses meet.
- Use half blocks for the ridge. Finish the top row of the roof with half blocks or logs.
- Emphasize the gable walls. Add X or vertical lines with logs to the triangular walls at both ends of the roof to connect the wooden framework.
Choose a roof color that contrasts with the walls. A dark spruce or dark oak roof goes well with light stone walls. You can mix two types of stairs for a stained effect on the roof, but it's better to keep it clean with one type at first.
Details — windows, trapdoors, flower pots.
Once the frame and roof are up, the house is no longer just a box. Adding a few small blocks makes it a 'lived-in house'.
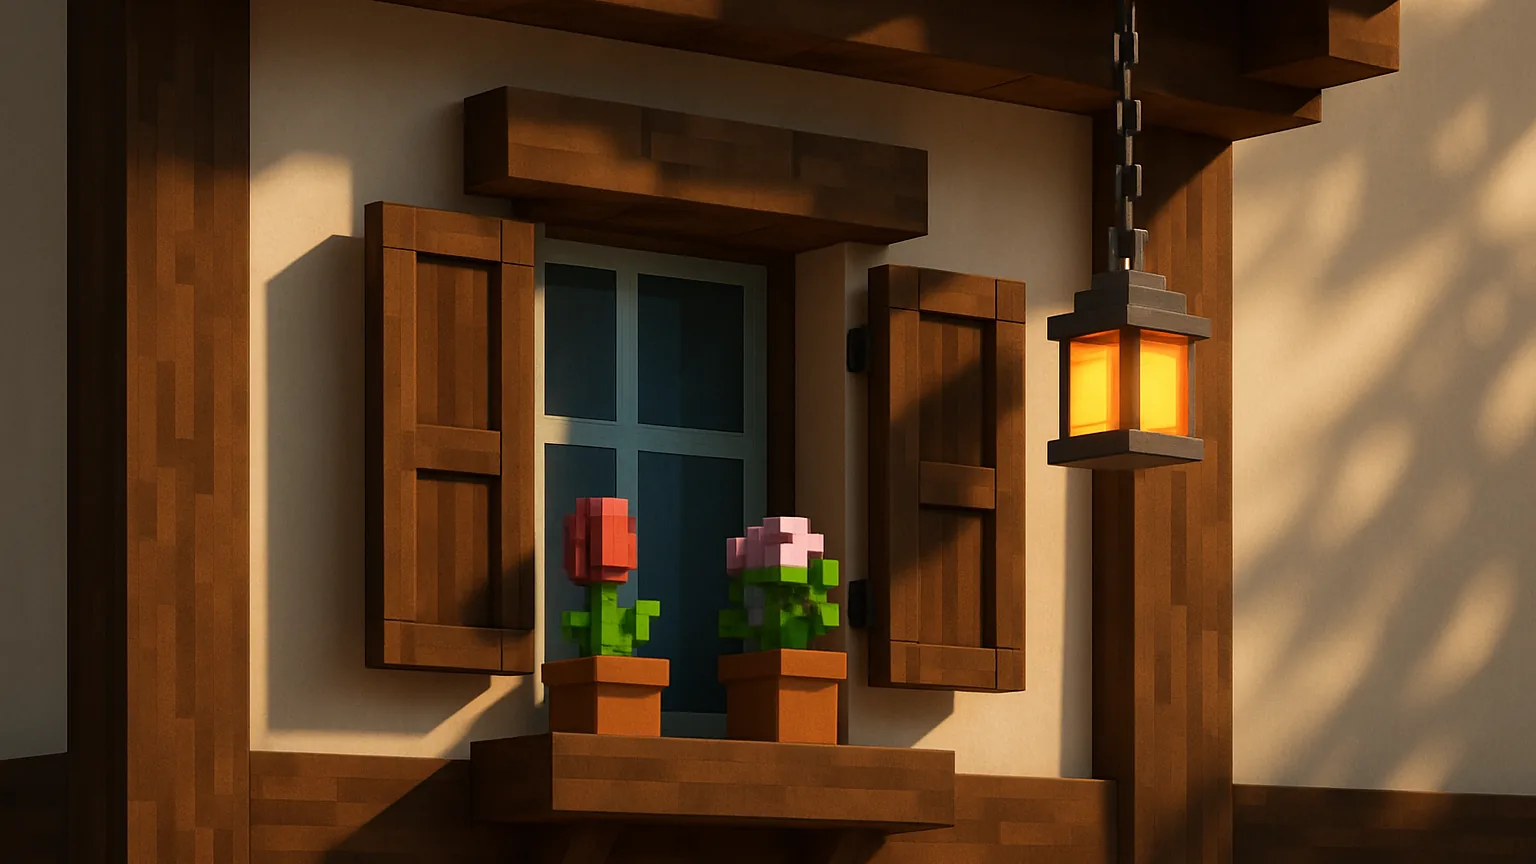
- Place windows inside the walls. If you place glass panes one block inside the wall, it creates a window frame. Put upside-down stairs above and regular stairs or trapdoors below to create a window sill.
- Trapdoor shutters. Trapdoors attach to the top or bottom half of a block and, when opened, become a thin panel standing on the attached side. If you attach trapdoors to the walls on either side of the window and leave them open, they look like shutters.
- Flower pots and flowers. Place flower pots on the window sill and plant flowers, saplings, or azaleas. You can plant flowers, saplings, ferns, cacti, and azaleas in pots that are one block high.
- Hanging lights. Lanterns can be hung from the bottom of blocks and connected with chains. Hanging one under the eaves or above the door changes the night scenery dramatically. You can make lanterns by surrounding a torch with 8 iron nuggets.
- Space in front of the door. Adding half block steps, fence railings, barrels, or hay bales in front of the door gives a sense of life.
From one house to a village.
The medieval style shines when several houses come together. Keep the following in mind when decorating a village.
- Start with the square. Place a square with a well, a large tree, or a bell in the center and extend paths in all directions.
- Make the paths winding. Mix dirt paths, gravel, and coarse dirt, varying the width to 2-3 blocks to create curves. Straight paths look too much like a city.
- Vary the size and direction of the houses. If you just copy and line up the same house, it will look like a housing complex. Change the size, number of floors, and roof direction for each house.
- Share the palette. If you change the materials for each house, it loses cohesion. It's better for the whole village to use the same palette, with special buildings like blacksmiths or churches using more stone.
- Fill the gaps. Place gardens, fences, composters, and trees between houses. The fewer empty lawns, the more alive the village feels.
Five common mistakes.
| Mistake | Why it looks awkward | How to fix it |
|---|---|---|
| Walls and pillars on the same plane. | No shadows, looks flat. | Move the wall one block inside. |
| Roof without eaves. | Looks like a box with a lid. | Extend the roof one block beyond the walls. |
| Walls too low. | Feels cramped under the roof. | First floor walls should be at least 4 blocks high. |
| Too many mixed materials. | Looks messy and chaotic. | Main materials for the role: 1, secondary: 1-2 |
| Place the window directly into the wall. | It looks like the window is drawn in. | Leave one block space and add a windowsill and shutters. |
Summary of Part 1
- The reasons for the box house are depth, materials, roof, and proportion.
- The palette is dark framework, light walls, and heavy base.
- The building order is base → pillars → beams → walls (one block inward).
- The roof should be stairs, with the eaves extended by one block.
- Finish the window with one block space and add shutters, flower pots, and lanterns.
Part 2 will cover the opposite style, modern house, using concrete and glass, asymmetric shapes, and how to hide lighting without light blocks. If you have built a medieval house, please post it on the MINECAP building forum.
Reference materials
Want to talk about this story?
Share your take with other Minecraft players on MINECAP.